A complete set up guide
Beneteau First 36.7 One Design
(ver 0.8 April 2008)
Introduction by John Baxter
The Beneteau-36.7 has proven to be a great one-design for the owner who prefers some interior comforts and driving his or her own boat. With over 500 boats now sold, many areas are generating one-design fleets in addition to racing PHRF and other rating systems. These local fleets will help spur further growth. Fortunately, the Beneteau-36.7 rates fairly well in most handicapping systems.
Our Beneteau-36.7 Tuning Guide was developed by the Offshore One-Design Division. This Division is active in the Beneteau-40.7, Farr-40, Mumm-30, Tartan-10, J-120. J-105, J-24, and many other Offshore One Design Classes. We have included some extra helpful tips on set up of the Beneteau-36.7, which will add to the enjoyment of another great One Design. All of our Tuning Guides are designed to help maximize performance, and make adjustments fast and easy. This will help you get the most out of the boat. We will continually update this guide as new developments and tuning techniques emerge.
After sailing the 36.7 you may come up with some ideas not addressed in our guide. We are always happy to discuss your ideas. Feel free give us a call. Remember this is just a guide, and you still have to get out and sail.
Good Luck and Great Sailing,
John K. Baxter
What you need to get started for General Tuning:
There will be a couple of items needed before tuning the Beneteau-36.7. Below is a list that will help you throughout the tuning process.
- Note Pad and pen
- A 50' Tape Measure
- The RT-11 Rod Loose Gauge
- Crescent Wrench and Screw Driver
- Plastic Wire Ties (Various Sizes)
- Roll of Rigging Tape
Speed tunning:
The Beneteau-36.7Âs Aluminum 2 swept spreader rig and no runners has simplified sailing and boat handling. It does require some different techniques in rig tuning. To fully understand how to tune the rig, first take a step back and look at what the goal of rig tuning is. The main objective with tuning is to insure that the rig fits the sails and that the sails work together. The mast bend and headstay sag should fit the sails as they were designed.
The basic concepts of setting up the Beneteau-36.7 rig is not that different from many other modern boats today. The basic philosophy is to match headstay sag and mastbend to fit the sails and then adjust the rig and sails to keep this relationship similar as conditions change. Use Wire Cable Ties to pin the rig as they are much more easy to use then the cotter pins.
Depending on the headstay system adjusting the headstay may not be practicle on some 36.7Âs. Please note which set up chart is approperate for your boat.
Increasing pressure on the D-1Âs (Lowers) and D-2Âs (Diagionals) will straighten and stiffen the mast fore and aft and also increase pressure on the headstay. By stiffining the rig fore and aft, the backstay will have a more direct affect on headstay sag. Tighter rig tension will generate less headstay sag depowering the sailplan, while a looser rig allows headstay to sag and powering up.
See Approperate Quick Tuning Guide
From the Factory:
The Beneteau 36.7 can use some upgrades from the factory. In the following sections you will find our recommendations for these upgrades and modifications. These upgrades will make the boat more easy to sail and trim around the race course.
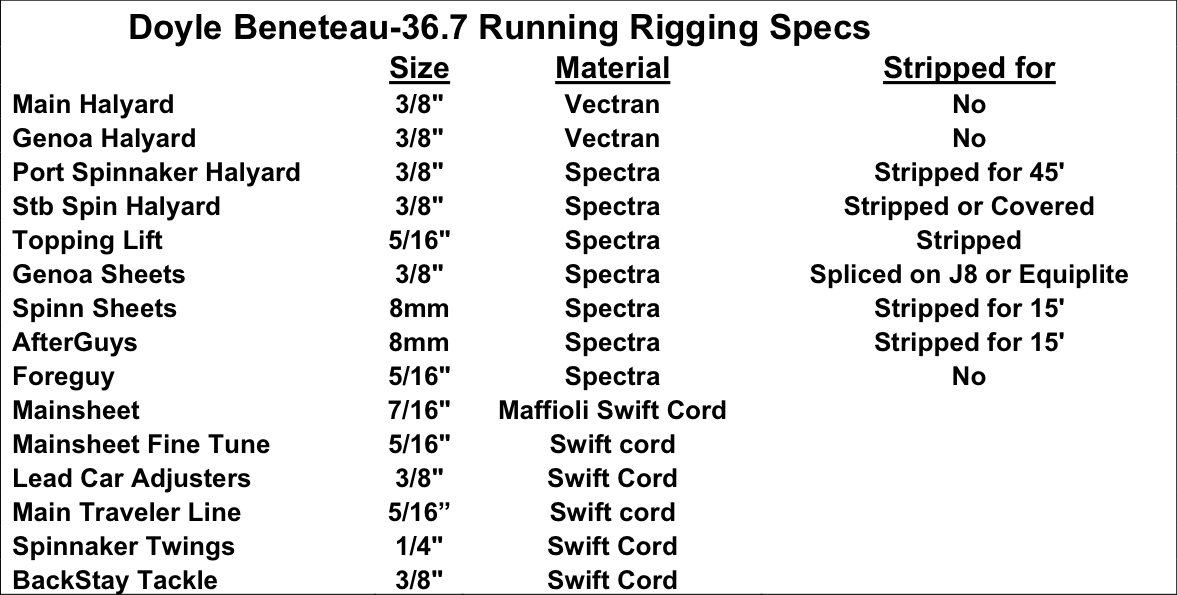
Running Rigging
There are a number of improvements over the standard Running Rigging provided with the boat. Many Dealers will offer an upgraded running rigging package. This package is strongly recommended for racing. Below you will find our recommendations.
Outhaul and Cunningham Set Up
The Outhaul and Cunningham on the 36.7 can be set up so the controls are close and easy to reach for the mainsail trimmer.
Outhaul
The factory set up for the outhaul runs through a stopper and requires a winch for adjustments. Doyle Sailmakers have developed a simple and easy to use cascading outhaul system for the Beneteau-
This system can either be a 12:1 or easily converted for Heavy Air to a 24:1. Depending on how an owner wants to set up the Pit area, the cascading outhaul is a must
for quick adjustments to the outhaul. This system does not require a winch. Typically, we recommend running the Outhaul back to the Original Vang Cleat

Cunningham
The boat does not really come with a set up for the Cunningham. Similar to the Outhaul A simple small?purchase system is used we then run the Cunningham back again to the original Vang Cleat .
Upper= Harken #2637
Lower= Harken #2638
¼ Maffioli Swift Cord

Cunningham led back to Port Vang Cleat as seen in the photo right.

Block On Sail Cunningham Loop Harken #340
Pit Area General (update 2007)
The Pit Area can be simplified quite a bit, and can be set up for convenience. Some people will want different things. We recommend the following things as general Thoughts.
- Remove the Mainsail Boom Topping lift
- Remove the 2nd Reef Line esp. if the mainsail only has one reef
- Cross the spinnaker Halyards so the Port Halyard (Your Primary Spin Halyard) exits on the Starboard side of the mast.
Now having stated the basics lets look at the Vang and Spinnaker Pole topping lift.
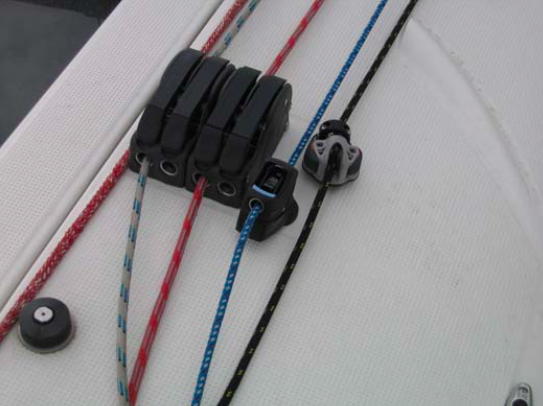
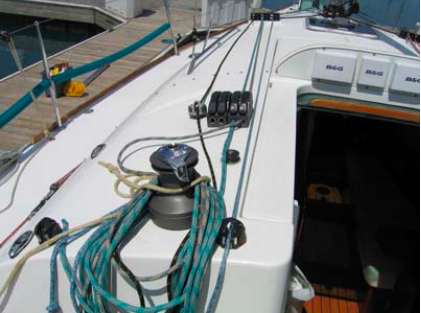
In this photo, (Starboard Side Of Boat) the Spinnaker Pole Topping lift (Blue) and Vang (Black) have been run through Swivel Cleat Stoppers. This allows the toping lift and vang to be adjusted from the high side. It is not necessary to use Swivel Cleats and the stoppers can be used as well.

Starboard Side at Mast
Red=Port Spin
Blue= Topping Lift
White/Blue = Main Halyard
Black= Vang
Red = Outhaul
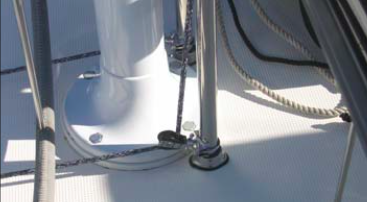
Here is the Vang Set up (Black Line) on the Port side

Port Side at Mast
Green = Stb Spin Halyard
White/Blue= Genoa
Halyard Black = Vang
Lt. Blue= Cunningham
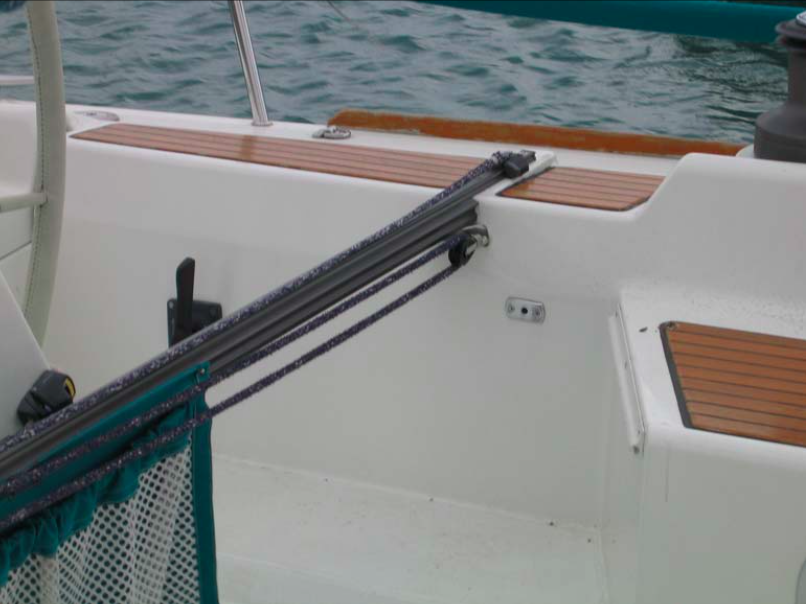
Mainsheet and Backstay Set up
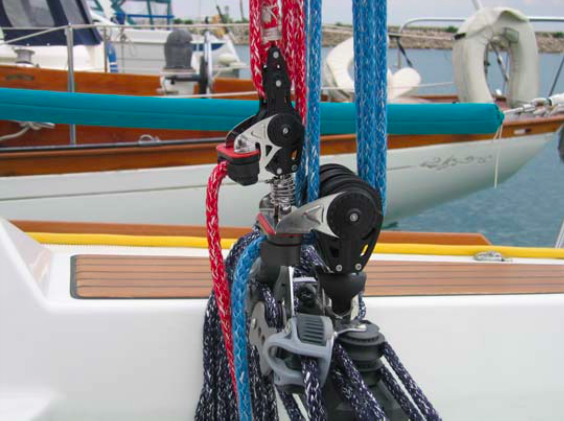
The Mainsheet and Backstay are the most important sail controls for the 36.7. The Maffioli Swift Cord is the best mainsheet you can have. It is very soft on the hands and is almost impossible to kink which is reallyimportant during mark roundings. The standard Double Cleat does not however work well and there is only one side of the cleat applying pressure and the sheet can fall out of the cleat.
The mainsheet system shown on right works perfectly.
Bottom Block = Harken #2629
Fine Tune =Harken # 2658
This is all that needs to be replacedÂ
the Mainsheet purchase remains the same.
(Note in Hv Air the Mainsheet can easily be led up to the weather Genoa Winch)
Backstay Led forward and crosses on Foor in front on the pod up to Spinlock Powerlocks or cams
It is critical that the Backstay Cleats are in line with the traveler as it gives the Mainsail trimmer a direct pull on the line. Again, 7mm Maffioli Swift Cord is the best line for this application. (Note A simple retro-fit is possible on the older boats without the pod..See below)
Older Boat Backstay Set Up
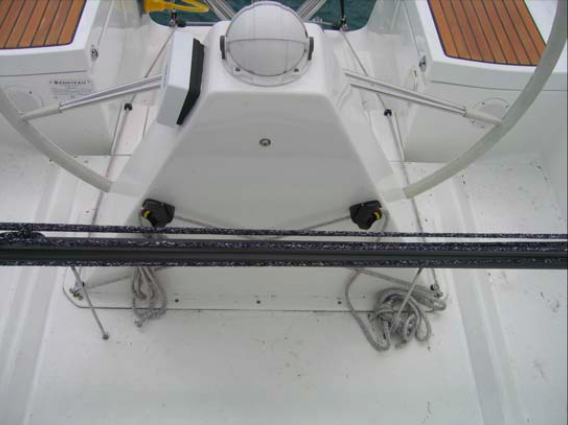
For 2006 we worked with Jim and Mike Anderson on their 36.7 Raptor and JT Charles on Taurus to come up with a modification for the racing backstay control. The goal was to minimize the friction, and increase the ease in use. Many of the origional boats can be found running the backstay control line around the edges of the cockpit, and up to a cleat. While this system was a huge improvement over the std set up, the new 2007 set up is an even bigger improvement.
Parts needed:
- 2 Ronstan RF-5 Swivel Cleat Platform
- 4 SS ¼ Hose Clamps
- 2 Harken #061 and #166 (Harken Lead Block for RFÂs)
You can either attach the RF-5 using Hose Clamps or drill and Pop Rivit to the Edson binnicle guard. The Harken Lead Blocks go as low as possible on the post. Note: The lead block needs some slight bending to fitaround the post.
Ronstan RF-5 Mounted to Post
Harken #061 w/ Harken #166 Bullet Block
The Backstay then runs straight forward to the block at the base of the post. People worry about tripping on the line. Honestly do not worry about it..You would be surprised at how it does not get in your way at all. This system eliminates 4 90 deg turns in the backstay line..It also provides more throw if you current system just goes to the transom corners and then fwd. The increased leverage in pulling the backstay from the center is amazing. It makes the backstay so easy to play.

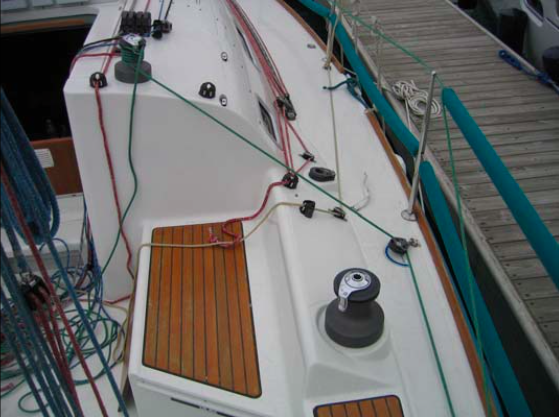
Mainsail and Genoa Traveler
Many boats have made modification to the Genoa and Main Traveler Cars. The Standard set up on the Genoa Cars does not provide enough purchase. A fairly simple retro-fit can be made.
Genoa Car has a double block addded
Genoa track end has a double w/ eye
Mainsail Traveler right has been modified by removing the track end and adding 2 Harken 40mm Carbo blocksto eye bolts below the traveler. These Eyebolts replace the bolts used for Traveler Bracket.
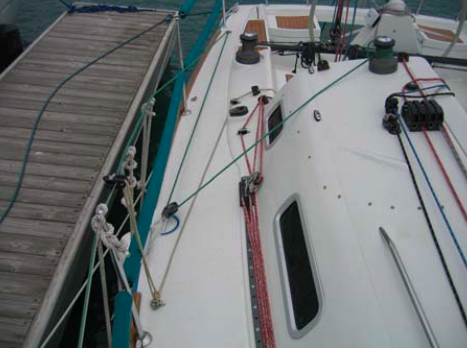
Spinnaker Sheet Leads (updated 2008)
Some of the Beneteau-36.7Âs will use sheets and Lazy guys and some will use just sheets. In most cases end for end jibes are desired. However many find doing a dip pole jibe allows the helmsman to turn faster. The key is to set up the jibes based on crew preference. Regardless as to which method is used the spinnaker sheets need a proper lead. The standard configuration brings the spin sheet directly across the cockpit.
There are a few options on how to best achieve this.
One option is you will tie a block on the mid Boat cleat to re-direct the sheet to the cabin topwinch. This is a very common way to achieve this. Please note that using this method places substantially higher loads on the block because of the angle. Make sure that you are using a High Load Block.
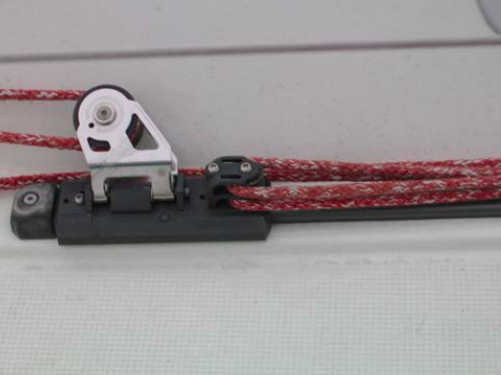
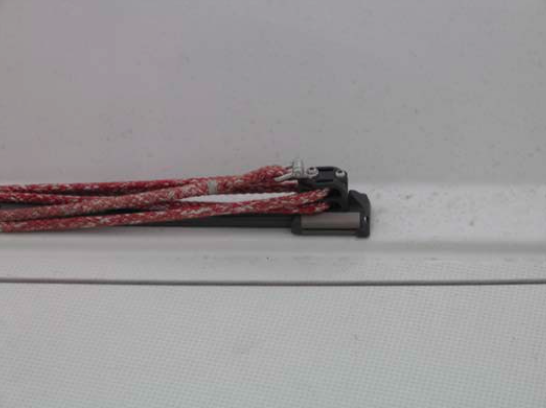
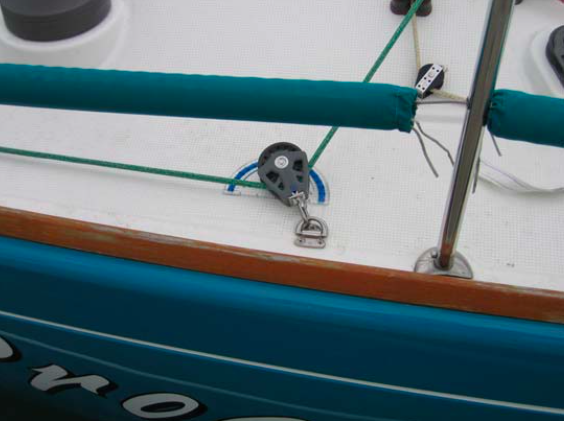
NEW 2008
The best option that we have developed is using a block on a Pad Eye to direct the sheet to the cabin top winch. This small Wichard folding pad eye is placed just aft of the stanchion. A ratchet black can be used on the pad eye for light air trimming.
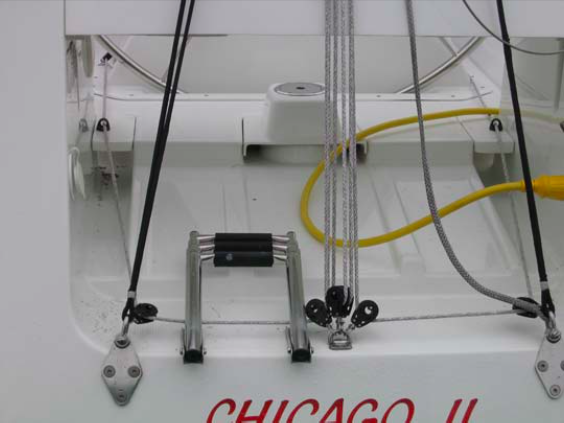
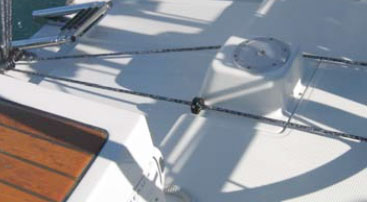
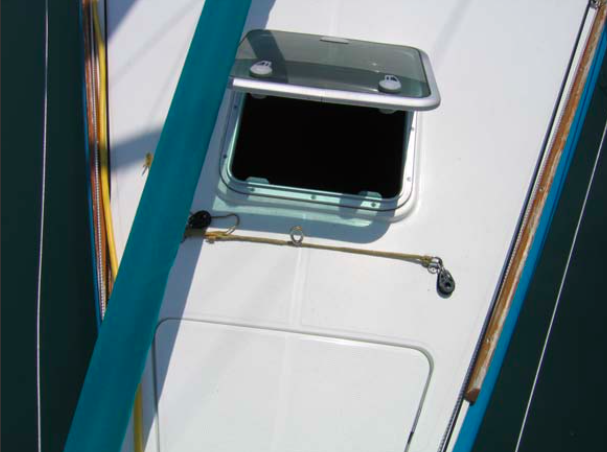
Center Point Forguy (new 2008)
Another area we have found to improve on is the forguy layout. The std set up has the forguy splitting to a padeye on either side of the foredeck hatch. This reduces the room the genoa has on both sides of the forguy. It also makes it very difficult to move from side to side.
In the photo, a piece of vectran is lashed in between the two pad eyes with a ring in its center. The forguy connects to the center ring and then goes to the blocks on the padeyes and then aft. This keeps the forguy centered on the foredeck.
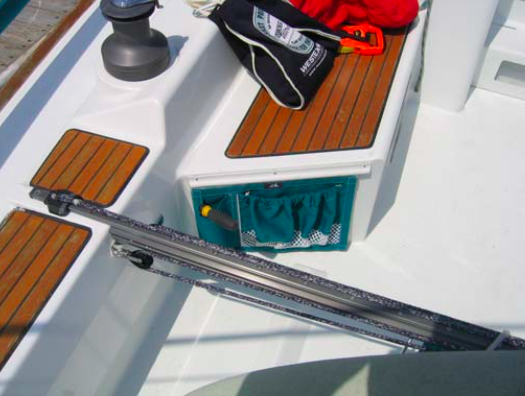
Miscellaneous Items
Custom Cockpit Sheet Bags w/ Winch Handle Holder Mounted on track
Custom Sheet Bag Mounted on Main Traveler
Carbon Fiber Spinnaker Pole Cover
Custom Padded Saloon Table Bag
Mainsail Cover (Available From Doyle Sailmakers)
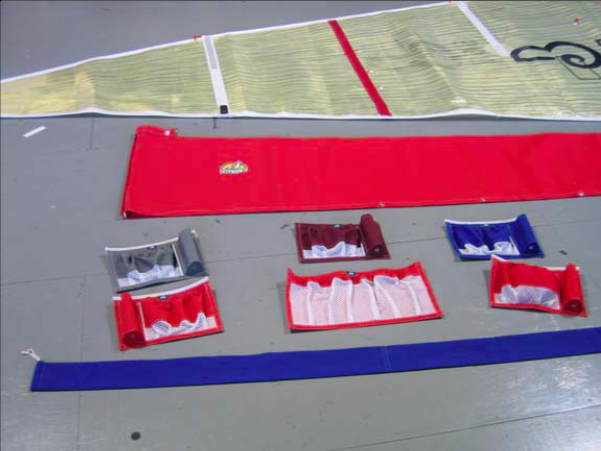
Cleat Blocs keeps lines clear
(Available from Doyle Sailmakers)
